
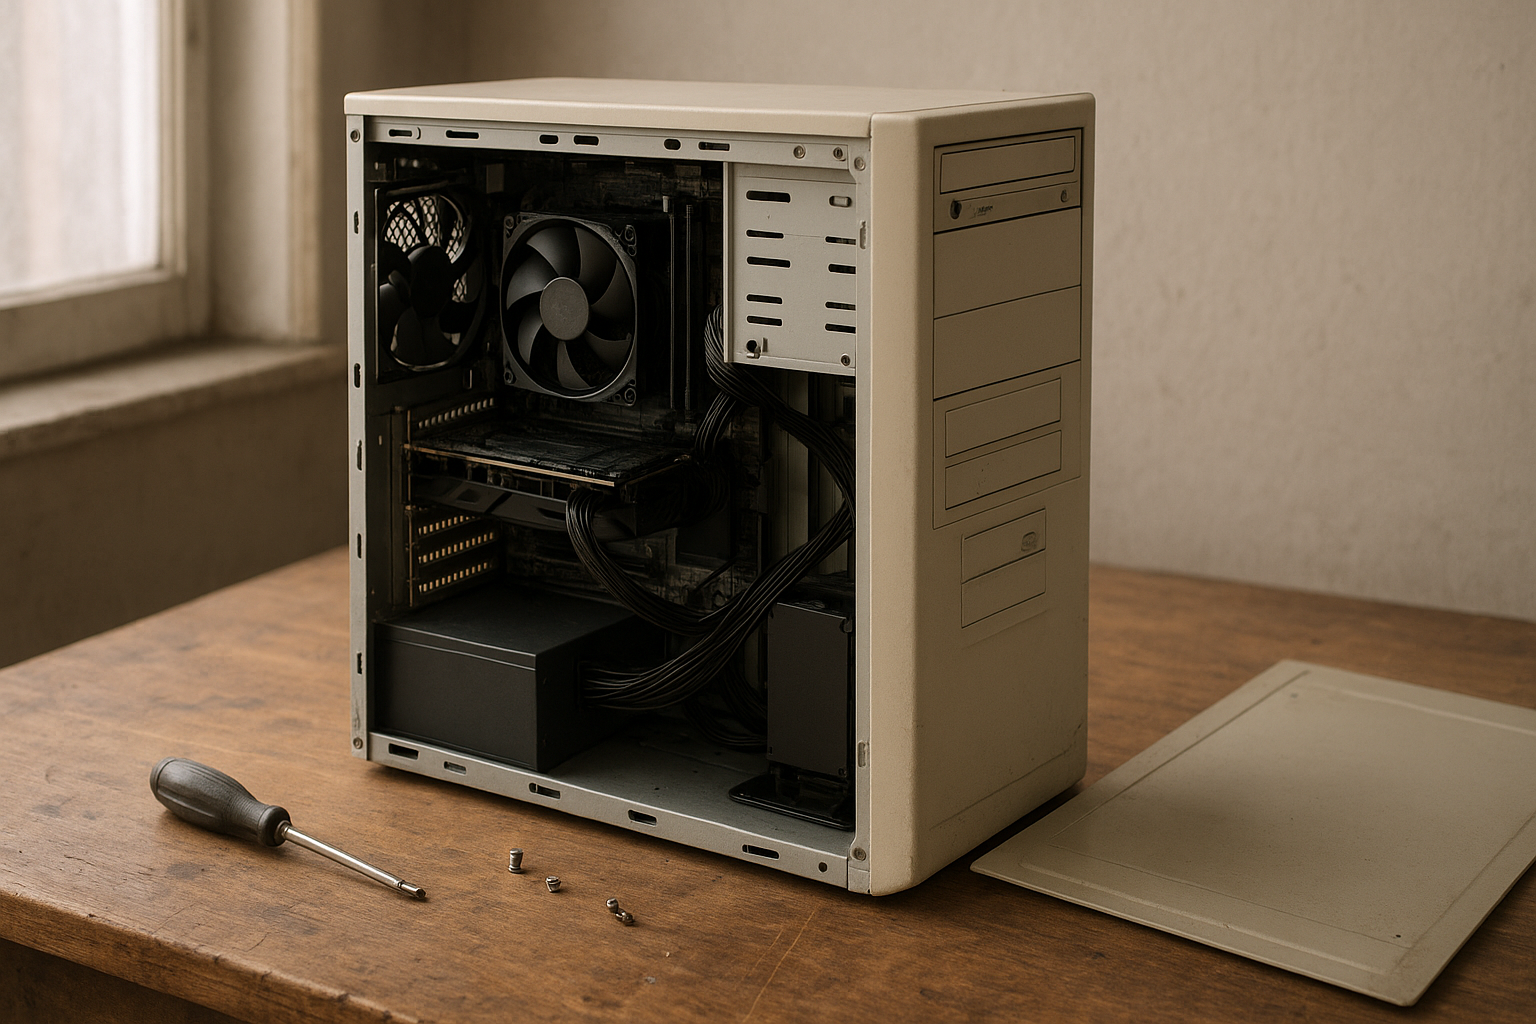
A retro sleeper PC build conceals modern hardware behind the beige plastic, drive bays, and restrained styling of an older desktop. From the outside, it can resemble a 1990s office computer; inside, it can deliver smooth 1080p gaming, fast storage, quiet operation, and current software support.
This guide explains how to choose a suitable vintage case, plan around modern component dimensions, manage airflow and power, preserve the original front-panel character, and avoid the common traps that can turn a charming retro PC build project into an unsafe or impractical machine.
Table of Contents
- Choose the Right Vintage Case
- Plan the Modern Hardware
- Retro Sleeper PC Build Layout Options
- Power, Airflow, and Thermals
- Modifying the Case Without Losing the Character
- Front-Panel Connectivity and Storage
- Software and the Retro Gaming Experience
- Build Process and Testing
- Key Takeaways
- Frequently Asked Questions
- Conclusion
Choose the Right Vintage Case
The case drives almost every other decision. A beige computer case from the late 1980s or 1990s may look spacious from the outside, but its internal layout can be difficult to reuse. Older systems often used proprietary motherboard sizes, unusual power supplies, fixed drive cages, and limited ventilation.
Begin by treating the case as a mechanical project, not merely a cosmetic purchase. Before buying components, photograph the interior, remove the original hardware, and measure the following:
- The motherboard mounting area, including the usable width, depth, and position of standoffs.
- The distance from the rear expansion slots to the front drive cages.
- The maximum graphics card length, height, and thickness.
- The CPU cooler height available beneath the side panel.
- The power-supply opening and the distance between its mounting screws.
- The space behind the front panel for switches, USB ports, and cables.
- The location of vents, fan openings, and solid plastic sections that may restrict intake.
Do not assume an old case supports standard ATX hardware simply because it is large enough. Some desktop cases have a nonstandard rear I/O opening, while others position the power supply beside the processor or use a motherboard tray whose mounting points do not match current boards.
Which vintage cases make good sleeper builds?
Mid-tower and full-tower cases are usually the easiest starting points because they provide room for a standard rear I/O shield, full-height expansion cards, and a conventional motherboard. Horizontal desktop cases can also work well, particularly with Mini-ITX or Micro-ATX hardware, but their shallow height often limits the CPU cooler and graphics card.
Look for a case with a removable side panel, a metal chassis in reasonable condition, and enough unused volume around the motherboard. A removable drive cage is especially valuable because it gives you more freedom to position a power supply, radiator, or intake fan.
Be cautious with cases that have brittle plastic clips, severe rust, missing structural panels, or a proprietary power connector. Cosmetic yellowing is generally manageable; cracked mounting points and damaged mains wiring are far more serious problems.
Plan the Modern Hardware
A successful retro sleeper PC build starts with a parts list built around dimensions, power, and software requirements rather than appearance. The fastest processor or largest graphics card is rarely the best choice if it forces you to remove the entire interior or creates a thermal problem.
For a balanced 90s-inspired gaming PC, a modern six- or eight-core processor, 16 GB or 32 GB of memory, an NVMe solid-state drive, and a mid-range graphics card are usually more sensible than flagship components. The exact parts will depend on your budget, games, monitor resolution, and case constraints.
Choose the motherboard around the case
Mini-ITX boards simplify cramped builds because they use a small mounting footprint and often leave room for cable routing. Micro-ATX can provide more expansion slots and better value, but it requires a larger, uninterrupted motherboard area. Standard ATX is appropriate only when the case’s mounting points and rear opening genuinely support it.
Do not drill new motherboard standoff holes until you have confirmed that the metal tray can accept them safely. Every standoff must align with a matching hole in the motherboard. An extra standoff beneath the board can cause a short circuit.
If the original rear opening does not accept a modern I/O shield, you have three practical choices: adapt the opening with a carefully made panel, use a board with a removable I/O shield and a custom surround, or transplant the modern system into the case while accepting more visible modification. Leaving the rear exposed is not a good long-term solution because it admits dust and weakens shielding.
Match the graphics card to the enclosure
Graphics cards are often the most difficult component in a modern hardware in vintage PC case project. Measure card length from the bracket to the end of the cooler, and check its height, thickness, power-connector position, and clearance from the side panel.
A short, two-slot card can be easier to install than a faster triple-slot model. If the case has a horizontal layout, check whether the card will sit directly above the processor or block the only intake path. A riser cable can solve a layout problem, but it adds cost, mounting work, and another potential point of failure.
Leave enough room to connect the graphics-card power cable without sharply folding it against the side panel. Follow the graphics-card manufacturer’s guidance for connector seating and cable clearance, especially when using a newer high-power connector.
Storage, memory, and expansion
An NVMe SSD is an excellent hidden upgrade because it produces little heat, has no moving parts, and can be mounted directly on many modern motherboards. If the vintage case has a visible 3.5-inch hard-drive caddy, you can install a SATA SSD behind an adapter or create a concealed mounting plate instead of using an original mechanical drive.
Memory capacity should support your intended software without compromising the platform. For general Windows gaming, 16 GB is a workable baseline and 32 GB provides more room for modern games and multitasking. For a Linux, emulation, or older-game machine, less may be technically sufficient, but buying a matched kit supported by the motherboard is usually the simpler route.
| Component choice | Why it helps a vintage case | What to check first |
|---|---|---|
| Mini-ITX motherboard | Small footprint and flexible placement | Expansion needs, cooler clearance, and rear I/O alignment |
| Micro-ATX motherboard | More slots and often good value | Tray dimensions and the position of the bottom expansion slots |
| Short or low-profile graphics card | Less risk of hitting drive cages or side panels | Length, slot thickness, power connector, and airflow |
| NVMe SSD | Fast, quiet storage with no drive-cage requirement | Motherboard support and heatsink clearance |
| Standard ATX power supply | Broad compatibility and easy replacement | Mounting pattern, cable length, and physical depth |
| SFX or Flex ATX power supply | Can free space in a compact enclosure | Proper mounting, safe cable adapters, and adequate output |
Retro Sleeper PC Build Layout Options
There is no single correct way to build a sleeper computer. The best approach depends on how much of the original hardware layout you want to preserve and how much fabrication you are comfortable doing.
Option one: direct motherboard replacement
This is the cleanest approach when the case has a conventional removable tray or enough flat metal for new standoffs. Remove the original motherboard, install a modern board in the correct position, and adapt the rear I/O and expansion openings.
The advantages are straightforward cable routing, normal component access, and fewer unusual adapters. The drawback is that the finished system may require visible cutting or replacement of the rear panel, which can reduce the exterior’s authenticity.
Option two: internal donor chassis
For a fragile or highly collectible case, an internal donor chassis can house the modern hardware while the vintage shell provides the appearance. This approach preserves more of the original metalwork and can provide a correctly aligned motherboard tray, power-supply mount, and expansion slots.
It also consumes internal space and may make the front-panel wiring more complicated. Use this method when preserving the exterior matters more than keeping every internal component in its original position.
Option three: hidden compact system
A Mini-ITX board, compact power supply, and integrated graphics or small discrete GPU can create a relatively low-impact installation. This is useful for a retro gaming PC setup focused on older titles, emulation, streaming, or desktop use rather than demanding current games.
The limitation is upgradeability. Small systems may have fewer memory slots, fewer expansion slots, and less cooling capacity. A compact layout is not automatically a quiet layout, so fan selection and airflow still matter.
Practical rule: preserve the features that define the case’s identity—its front bezel, power button, drive-door arrangement, and silhouette. Modify hidden brackets before cutting visible plastic.
Power, Airflow, and Thermals
Power and cooling are where a visually convincing beige computer case build can fail. Many original cases were designed around low-power processors, small exhaust fans, and power supplies that are now too old to trust. Reusing an original PSU is generally a poor idea unless it has been professionally inspected and is demonstrably compatible with the new system.
Install a modern, reputable power supply with enough capacity for the processor and graphics card. Capacity alone does not guarantee compatibility: check the required motherboard connectors, graphics-card connectors, cable lengths, and the unit’s physical depth.
Do not use a passive or improvised adapter to make a proprietary vintage power supply fit a modern motherboard. Older systems may use connectors that look similar to current ATX connectors but have different wiring. A wiring mistake can damage the board and connected components.
Design the airflow path before installing hardware
Most classic cases need a deliberate airflow plan. A useful starting point is front or lower intake and rear or upper exhaust, with the fans arranged to move air through the chassis rather than simply circulate it inside.
- Use the largest fan that fits without cutting visible sections of the case.
- Keep the intake path clear of unused drive cages, loose cables, and dense dust filters.
- Provide a direct exhaust route near the CPU and graphics card.
- Use fan grilles or guards where fingers and cables could reach the blades.
- Check temperatures with the side panel installed, not only on an open test bench.
Solid front bezels can make intake difficult. If the original front has a hidden vent, retain it and clean the perforations. If it has no meaningful intake, a concealed fan behind the lower bezel or a quiet rear exhaust may be safer than cutting a large modern mesh opening into the front.
Choose cooling that fits the visual and physical design
A tower CPU cooler may provide strong thermal performance but collide with the side panel. Low-profile coolers are easier to hide and can work well with efficient processors, although their performance depends on the processor’s power limits and the case airflow.
Liquid cooling is possible in some large towers, but it is rarely the first choice for a classic PC case mod. Radiator mounting can require major cutting, pump noise may conflict with the retro experience, and the tubing needs careful routing. A conventional air cooler is usually simpler to install, inspect, and replace.
After assembly, monitor processor and graphics temperatures during a sustained workload. Do not rely on a single idle reading. If temperatures rise sharply with the side panel fitted, improve the intake and exhaust path before reducing performance limits or accepting excessive fan noise.
Modifying the Case Without Losing the Character
Good modding is selective. The goal is not to make an old case look like a new gaming tower; it is to make the necessary changes disappear into the original design.
Make a cutting and drilling plan
Temporarily install the motherboard, power supply, graphics card, and cooler before cutting anything. Mark the required openings with masking tape, then remove every component before using a rotary tool, nibbler, drill, or file.
Cover nearby plastic and paint to protect them from swarf. Wear eye protection, deburr every metal edge, and vacuum the chassis thoroughly before reinstalling electronics. A small metal shaving can create a short circuit or become lodged in a fan.
Use existing openings wherever possible. For example, a former serial-port cutout may provide a discreet location for a USB extension, while an unused drive bay can conceal a power switch, fan controller, or audio connection.
Handle brittle plastic and yellowed surfaces carefully
Older ABS plastic can become brittle after years of heat and ultraviolet exposure. Do not force a stuck bezel or repeatedly twist a thin clip. Warm, controlled pressure and a proper disassembly sequence are safer than brute force.
Surface cleaning is usually the least risky cosmetic improvement. Remove dust and nicotine residue with a mild cleaner appropriate for the plastic, testing an inconspicuous area first. Aggressive solvents can soften printed labels, alter the sheen, or permanently damage the bezel.
Be careful with retrobright-style treatments. Hydrogen-peroxide methods can produce uneven results, alter the surface, and do not necessarily prevent future yellowing. If the case is rare or has printed markings you want to preserve, keeping its original patina may be preferable.
Preserve authenticity with restraint
Modern RGB lighting, tempered glass, and visible water-cooling hardware usually work against the sleeper concept. A small status LED or a dim light hidden behind the original drive door can provide useful feedback without changing the period appearance.
Keep original screws, drive bezels, labels, and brackets in a marked container. Even if you do not use them in this build, they make future restoration easier and protect the case’s value.
Front-Panel Connectivity and Storage
Original power switches often use simple momentary contacts, which makes them easier to reuse than proprietary front-panel electronics. Identify the switch wires with a multimeter or trace them visually, then connect the correct pair to the motherboard’s power-switch header. The switch normally has no polarity, but LEDs do.
Never connect an unknown front-panel cable directly to a motherboard header just because its plug fits. Older cases may include connections for a turbo button, key lock, reset switch, speaker, or proprietary display. Confirm each function before wiring it.
Adding USB without changing the front bezel
A USB extension cable can run from a motherboard header or rear port to an existing drive bay. A hidden hub behind a removable 5.25-inch cover is another option, although hubs add cable clutter and can be less reliable if poorly powered.
For a cleaner result, mount a small USB panel behind a drive door or use a printed bracket that follows the original bay shape. Keep high-speed USB cables away from fan blades and avoid tight bends at the motherboard connector.
Using optical drives and removable media
An optical drive can reinforce the period appearance and remains useful for legacy software, audio CDs, or installation media. It also adds noise, consumes a drive bay, and requires a SATA power and data connection.
If you do not need optical media, use the bay for a removable SSD tray, front USB ports, or a concealed fan intake. Avoid mounting a hot component directly behind a closed plastic door without ventilation.
Software and the Retro Gaming Experience
Hardware alone does not create a convincing retro gaming PC setup. The operating system, display, input devices, sound, and game configuration determine whether the machine feels like a usable period-inspired computer or merely a modern PC wearing an old shell.
For current Windows gaming, verify that the selected platform meets the operating system requirements before buying parts. Microsoft’s official Windows 11 specifications describe requirements such as supported processors, memory, storage, firmware, and security features. Older motherboards may lack features such as TPM 2.0 or Secure Boot support, so check the board documentation rather than assuming an operating-system upgrade will work.
For DOS and early Windows games, DOSBox provides a well-known way to run many classic DOS titles on current operating systems. Compatibility still varies by game, and lawful ownership of the software remains your responsibility.
Match the display and controls to the build
A modern LCD is convenient, but a 4:3 display or a monitor with a restrained stand can better suit a 90s-inspired gaming PC. Check the graphics card’s available outputs and use a reputable adapter if the display requires an older connector.
Input devices can remain practical without looking futuristic. A wired keyboard, a simple two-button mouse, or a period-style gamepad can support the theme. For competitive modern games, however, current low-latency peripherals may be more comfortable and responsive.
Use separate software profiles when the machine has two jobs. A quiet desktop profile can limit fan speed and background tasks, while a gaming profile can allow higher processor or graphics power within safe temperature limits.
Build Process and Testing
Approach the installation as a sequence of reversible tests. This reduces the risk of discovering after final assembly that a connector is inaccessible or a component touches the side panel.
- Document the original case. Photograph the exterior, wiring, brackets, labels, and screw locations before disassembly.
- Strip and clean the chassis. Remove old electronics, dust, loose foam, and any damaged wiring. Inspect for rust and sharp edges.
- Test-fit the major hardware. Place the motherboard, cooler, graphics card, and power supply inside the empty case.
- Plan cable routes. Identify where the 24-pin motherboard cable, CPU power cable, graphics cable, storage cables, and front-panel wires will run.
- Modify the metalwork. Drill or cut only after the test fit confirms the exact locations.
- Install standoffs and edge protection. Check that no standoff is misplaced and cover cut metal with suitable edging or a grommet.
- Bench-test the system. Start with the motherboard, processor, cooler, one memory kit, power supply, and graphics output. Confirm that it posts before closing the case.
- Install the operating system and drivers. Update firmware only according to the motherboard manufacturer’s instructions, then install chipset, graphics, network, and audio drivers.
- Test with the case closed. Check boot reliability, USB ports, front-panel controls, fan behavior, storage performance, and temperatures.
- Secure every cable and panel. Make sure no wire can contact a fan, rub against a sharp edge, or interfere with the power switch.
Common problems and practical fixes
| Problem | Likely cause | Practical response |
|---|---|---|
| The system will not start | Incorrect front-panel connection, incompatible PSU wiring, or loose main power connector | Disconnect the old wiring, verify the motherboard manual, and test the power-switch pins with a known-safe setup |
| The side panel will not close | CPU cooler, graphics card, connector, or cable bend exceeds the available clearance | Measure the obstruction and choose a shorter component or reroute the cable; do not force the panel |
| Temperatures are high | Blocked intake, inadequate exhaust, or a cooler operating in a stagnant air pocket | Improve the airflow path, remove unnecessary cages, and retest with the panel installed |
| USB ports disconnect | Loose header, damaged extension, poorly powered hub, or cable interference | Test each connection separately and replace low-quality extensions or hubs |
| Graphics card is unstable | Insufficient power connection, heat buildup, or card flex in a modified bracket | Reseat the card, secure the bracket, verify the power cable, and monitor temperatures |
Who should build one—and who should avoid it?
This project suits builders who enjoy fabrication, troubleshooting, and design compromises. It is especially rewarding if you already own a sentimental case, want a discreet workstation, or are collecting sleeper computer build ideas that do more than reproduce an old specification.
A conventional modern case is the better choice if you need maximum upgradeability, guaranteed airflow, quiet operation with high-end hardware, or a quick and predictable installation. You should also avoid modifying a rare collectible case if you are not comfortable making reversible brackets or repairing damaged plastic.
For a first project, choose an inexpensive common case rather than an irreplaceable machine. The experience gained from measuring, mounting, wiring, and cooling one build will make a later classic PC case mod much less stressful.
Key Takeaways
- Measure the case interior, rear opening, drive bays, cooler clearance, and power-supply mount before selecting hardware.
- Choose motherboard and graphics-card sizes around the enclosure, not the other way around.
- Replace an unknown original PSU with a modern, compatible unit rather than adapting questionable wiring.
- Plan intake and exhaust airflow with the side panel installed.
- Reuse the original power button and drive doors when practical, but verify every wire before connecting it.
- Make hidden metal modifications first and protect vintage plastic from unnecessary cutting or heat.
- Bench-test the system before final cable management and run sustained tests with the case closed.
- Use a standard modern case instead if you need high-end components, easy upgrades, or a short build timeline.
Frequently Asked Questions
What is a retro sleeper PC build?
A retro sleeper PC build places current or relatively modern computer hardware inside an older-looking case. The exterior may retain a beige front panel, physical drive doors, and a period-style power button, while the internal system runs a current operating system and modern games. The defining feature is the contrast between an ordinary vintage appearance and unexpectedly capable performance.
Can any beige computer case be used for a modern build?
No. The case must have enough room for the selected motherboard, cooler, graphics card, and power supply, along with a safe way to mount them. Proprietary rear openings, unusual motherboard trays, fragile plastic, and inadequate ventilation can make some cases unsuitable. Measure the interior and inspect the metal chassis before purchasing expensive components.
Should I keep the original power supply in a vintage PC?
Usually not. An old power supply may have degraded capacitors, an unsafe mains lead, insufficient output, or wiring that is incompatible with a modern motherboard. Unless the unit has been professionally evaluated and is known to be electrically suitable, replace it with a modern power supply that fits securely and provides the correct connectors. Never rely on connector shape alone to determine wiring compatibility.
What motherboard size is best for a retro sleeper computer?
Mini-ITX is often the easiest size for a difficult or compact case because it leaves more room around the board. Micro-ATX can be a better value when the chassis supports it and you need additional expansion slots. ATX works well only when the original tray and rear opening align with the standard. The best choice is the largest board that fits without forcing unsafe standoffs, blocked airflow, or difficult cable access.
How can I improve airflow without ruining the vintage appearance?
First, use existing vents and install a quiet rear exhaust fan. If the front bezel has a hidden lower vent, place an intake fan behind it and remove obstructive internal brackets. Keep cables away from the airflow path and test with the side panel fitted. If major cutting is required, make the opening in a hidden section or use a removable internal duct rather than replacing the distinctive front panel with mesh.
Can a retro sleeper PC run modern games?
Yes, provided the internal hardware is selected for the games and display resolution you intend to use. A compact mid-range graphics card and a modern processor can support many current games, but a vintage case may limit card size, cooling, and power capacity. Check each game’s system requirements and expect to tune graphics settings. High-end hardware may be technically possible but can undermine the case’s airflow and noise profile.
Is a sleeper PC the same as restoring an old computer?
No. Restoration aims to preserve or repair the original hardware and software, while a sleeper build uses the old exterior for a new internal system. You can preserve the case’s original controls and appearance while replacing nearly everything inside, but that is still a modern conversion. If historical authenticity matters, keep the original parts labeled and reversible modifications separate from the new installation.
What is the safest first project for learning how to build a sleeper PC?
Start with a common, inexpensive mid-tower case that has a removable side panel, a standard-width motherboard area, and no dangerous or proprietary power connector. Use modest-power components, an air cooler, and a conventional power supply. Avoid cutting the front bezel initially. A simple build lets you learn case measurement, standoff placement, front-panel wiring, and airflow management before attempting a more complex transplant.
Conclusion
A good retro sleeper PC build is less about hiding the most powerful hardware possible and more about making smart compromises. Choose the case first, verify every critical dimension, replace questionable power hardware, create a genuine airflow path, and preserve the exterior details that make the machine recognizable.
Your next step should be a measured case diagram. Record the motherboard footprint, power-supply opening, graphics-card clearance, cooler height, and fan locations before ordering anything. That simple planning document will show whether the project needs a direct transplant, a donor chassis, or a smaller platform—and it will prevent most expensive mistakes before the classic case mod begins.