Flutter Provider State Management: Your Complete Guide

Flutter Provider state management is one of the most efficient and beginner-friendly ways to manage state in a Flutter app. Whether you’re building a simple UI or a complex solution, Provider helps streamline data sharing and UI updates across widgets.
In this blog, we’ll explore everything from what Provider is, how it works, and how to implement it, complete with examples, benefits, and best practices.
Introduction to State Management
In mobile development, “state” refers to any data that can change — like user input, screen contents, API responses, or UI interactions.
Without state management, updating the UI as things change becomes error-prone. Flutter apps, built around a reactive UI framework, need effective state handling to stay performant and maintainable.
That’s where Flutter Provider state management comes in — a clean and reactive solution for app state updates.
Why Choose Flutter Provider State Management
Flutter offers several state management tools:
- setState() — basic, only for simple apps
- Provider — clean, scalable, perfect for most use cases
- Bloc — robust, but can be complex
- GetX, Riverpod — newer alternatives with unique strengths
Provider strikes a perfect balance between simplicity and capability. It supports reactive UI updates, keeps logic organized, and minimizes boilerplate code.
Getting Started with Provider
Step 1: Add Provider to pubspec.yaml
bashCopyEditflutter pub add provider
Then run:
bashCopyEditflutter pub get
Step-by-Step Example: Counter App
Let’s build a basic counter app using Flutter Provider. It will display a number with “+” and “–” buttons to update the value.
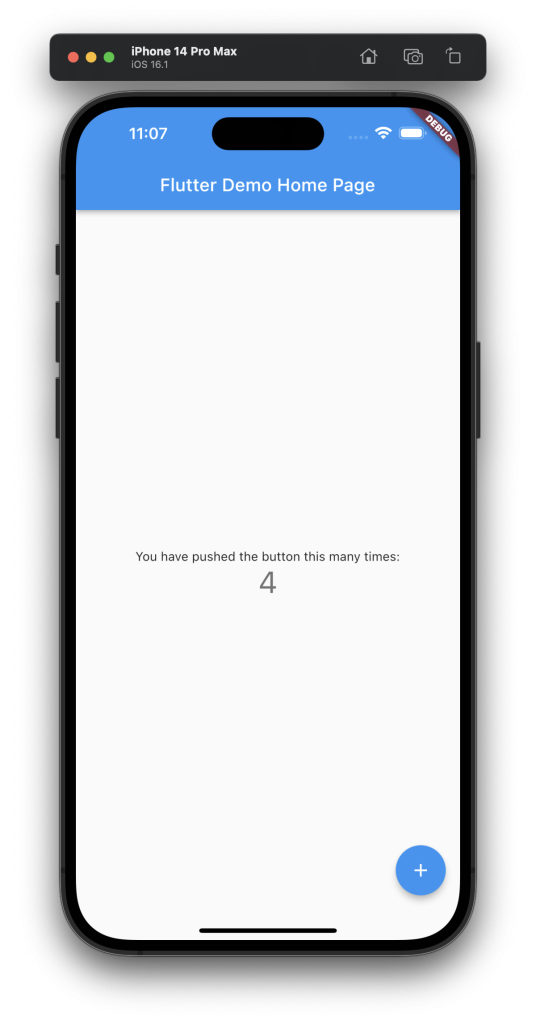
Alt text: Flutter Provider State Management Counter App
Step 2: Create the Provider Class
dartCopyEdit// counter_provider.dart
import 'package:flutter/material.dart';

class CounterProvider extends ChangeNotifier {
  int _counterValue = 0;

  int get counterValue => _counterValue;

  void increment() {
    _counterValue++;
    notifyListeners();
  }

  void decrement() {
    _counterValue--;
    notifyListeners();
  }
}
Step 3: Wrap the App with MultiProvider
dartCopyEdit// main.dart
import 'package:flutter/material.dart';
import 'package:provider/provider.dart';
import 'counter_provider.dart';
import 'home.dart';

void main() => runApp(const MyApp());

class MyApp extends StatelessWidget {
  const MyApp({super.key});

  @override
  Widget build(BuildContext context) {
    return MultiProvider(
      providers: [
        ChangeNotifierProvider(create: (_) => CounterProvider()),
      ],
      child: const MaterialApp(
        debugShowCheckedModeBanner: false,
        home: Home(),
      ),
    );
  }
}
Step 4: Build the Home UI
dartCopyEdit// home.dart
import 'package:flutter/material.dart';
import 'package:provider/provider.dart';
import 'counter_provider.dart';

class Home extends StatelessWidget {
  const Home({super.key});

  @override
  Widget build(BuildContext context) {
    final counter = context.watch<CounterProvider>().counterValue;

    return Scaffold(
      appBar: AppBar(title: const Text("Flutter Provider Example")),
      body: Center(
        child: Column(
          mainAxisAlignment: MainAxisAlignment.center,
          children: [
            Text(
              "Counter Value: $counter",
              style: const TextStyle(fontSize: 24),
            ),
            const SizedBox(height: 20),
            Row(
              mainAxisAlignment: MainAxisAlignment.center,
              children: [
                ElevatedButton(
                  onPressed: () =>
                      context.read<CounterProvider>().increment(),
                  child: const Text("+"),
                ),
                const SizedBox(width: 20),
                ElevatedButton(
                  onPressed: () =>
                      context.read<CounterProvider>().decrement(),
                  child: const Text("-"),
                ),
              ],
            ),
          ],
        ),
      ),
    );
  }
}
Benefits of Using Provider
1. Simplicity
Provider offers a simple API with minimal setup. It’s ideal for developers new to state management.
2. Reactive State Updates
Your widgets automatically update when state changes — no need to manually rebuild UI.
3. Scoped State Management
Control state exposure using ChangeNotifierProvider only where needed in the widget tree.
4. Cleaner Codebase
Decouples UI logic and business logic, making your app easier to test and maintain.
5. Community and Ecosystem
The package is officially supported and widely used. Check the Provider Docs for regular updates and examples.
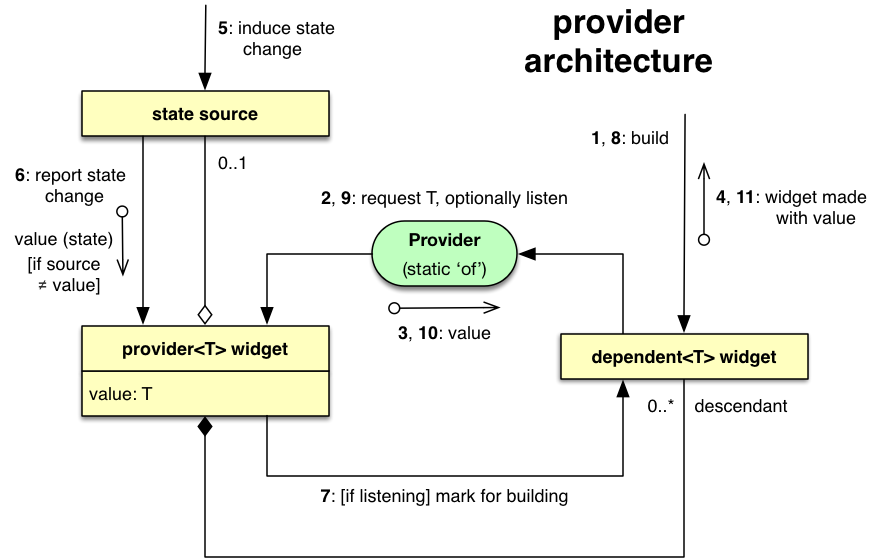
Alt text: Flutter Provider State Flow Diagram
Bonus: Best Practices
- Use
watch()only where you need rebuilds - Use
read()for one-time state access (like button clicks) - Split logic-heavy providers from UI for better separation
- Use multiple providers for modularity
- Wrap top-level widgets with
MultiProviderfor scalability
External Resources (DoFollow)
- Flutter’s Official Guide on State Management
- Provider Package on pub.dev
- Bloc vs Provider Comparison
Internal Links
- Check our guide on Flutter Navigation Techniques
- Explore more on Flutter UI Design Principles
Conclusion
Flutter Provider state management provides a clean, powerful way to manage state in Flutter apps. It’s a top choice for small to medium projects — keeping code modular, UI reactive, and state updates effortless.
If you’re building with Flutter and want a solid, scalable, and community-backed solution, Provider is your go-to.
Have questions, feedback, or suggestions? Drop them below — or let’s connect on GitHub.