

With n8n WordPress automation, you can move content from a brief, spreadsheet, form, or editorial queue into WordPress without manually copying fields between systems. A well-designed workflow can create a draft, upload featured media, assign taxonomy, request approval, and publish only after the right person reviews it.
This tutorial explains how to automate WordPress publishing with n8n while keeping editorial control. You will learn how the workflow fits together, how to connect n8n to the WordPress REST API, how to handle images and scheduling, and how to add safeguards that prevent duplicate or accidentally published posts.
Table of Contents
What n8n WordPress automation can do
n8n is a workflow automation platform that connects triggers, data transformations, conditions, and actions. Its WordPress integration can create and manage WordPress content, while the HTTP Request node can call WordPress REST API endpoints when the built-in node does not expose an option you need.
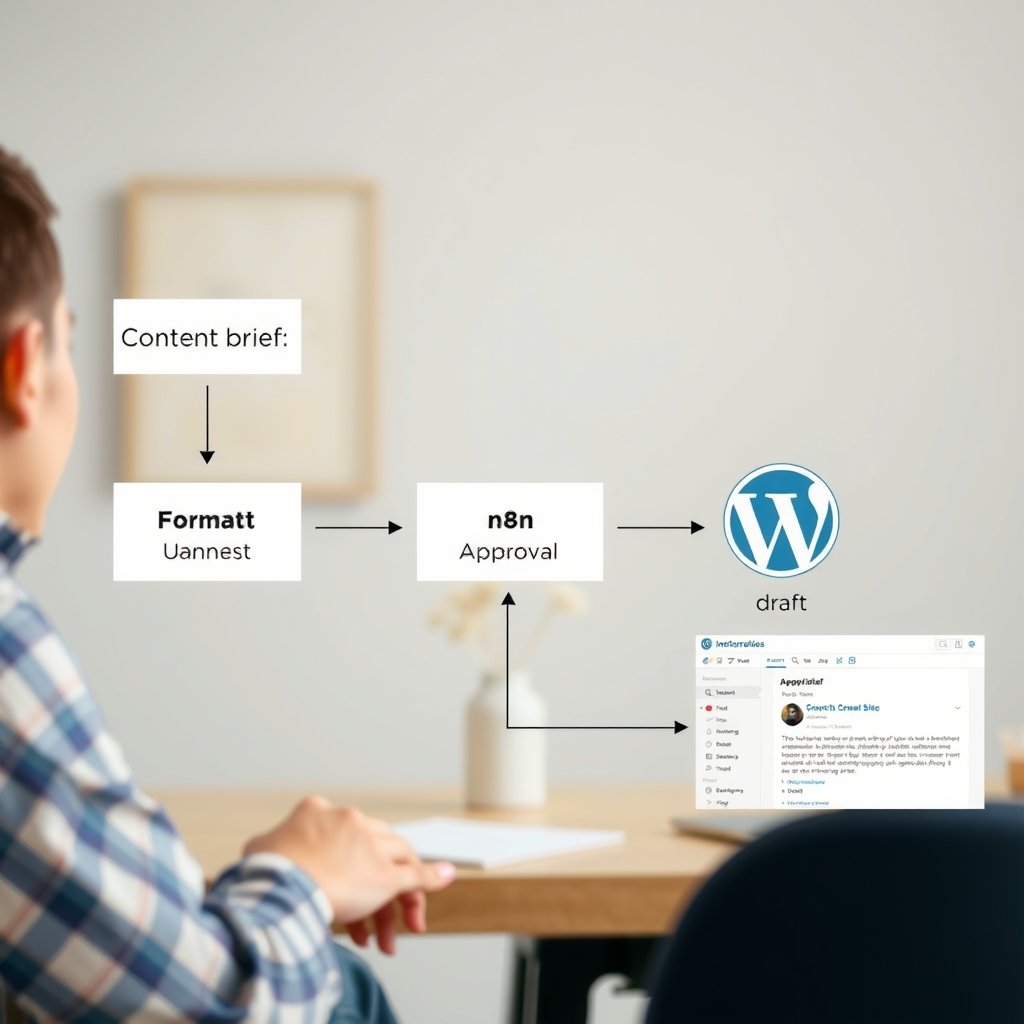
A typical automated WordPress content workflow looks like this:
- A trigger receives a content brief from a form, spreadsheet, database, RSS feed, webhook, or another application.
- n8n cleans the input and checks that required fields are present.
- A content step creates or receives a title, slug, excerpt, body, categories, tags, and image information.
- A review step sends the content to an editor or places it in an approval queue.
- n8n creates a WordPress draft or pending post.
- A later approval event changes the post status to publish or future.
The important distinction is between automating content handling and automatically generating and publishing unchecked content. n8n can reliably move and transform structured data, but editorial quality, factual accuracy, copyright, accessibility, and legal review still need an appropriate human process.
For a simple site, the workflow might only create drafts. For a larger team, it can also record the WordPress post ID, notify an editor, wait for approval, and update the same post rather than creating a second copy.
Choose the right publishing model
Before building nodes, decide what “publish” means for your team. The safest design is usually a staged process in which n8n prepares content and WordPress controls the final editorial state.
| Publishing model | How it works | Best suited to | Main trade-off |
|---|---|---|---|
| Draft creation | n8n creates a post with a draft status. An editor opens it in WordPress and finishes the work. | Most publishers, agencies, and teams using an editorial review. | It saves data entry but does not remove the final publishing task. |
| Pending review | n8n creates content that waits for a user with publishing permission to review it. | Teams with several writers or contributors. | The WordPress workflow and user roles must support the review process. |
| Scheduled publishing | n8n sends a future publication date and WordPress publishes the post at that time. | Preplanned news, newsletters, campaigns, and evergreen content. | Time zones, date formats, and missed schedules need testing. |
| Direct publishing | n8n creates a post with a publish status immediately. | Highly trusted, low-risk updates with strong validation. | A bad input, duplicate event, or incorrect claim can go live automatically. |
For most sites, start with draft or pending status. You can later add direct publishing for a narrow content type after you have monitored duplicates, failed requests, formatting problems, and approval mistakes.
When to avoid fully automatic publishing
Do not use an unattended publish step for content that requires specialist review, current legal or medical accuracy, rights-cleared media, or a nuanced brand voice unless your process includes effective controls. Automation can make a mistake faster and distribute it to more places.
It is also a poor fit when every article has a substantially different layout. In that case, a structured brief that creates a draft may be useful, but a general-purpose workflow should not try to guess every editorial decision.
Prepare WordPress and n8n
Confirm the WordPress requirements
You need a self-hosted WordPress site or a WordPress installation that permits the required REST API access. The site should use HTTPS, and the account used by n8n should have only the permissions needed for its task.
Check the following before you build the workflow:
- The REST API is reachable from the n8n instance.
- The target post type is exposed through the REST API.
- The account can create drafts, upload media, or publish, depending on your design.
- The required categories and tags already exist, or you have a separate process for creating them.
- Your theme and plugins do not depend on custom fields that the standard post endpoint cannot update.
- Your server, security plugin, firewall, or hosting provider does not block requests from n8n.
WordPress documents the available fields and operations for posts in its REST API posts reference. Review that reference alongside your actual site because plugins and custom post types can change what your installation supports.
Create an application password
For a normal WordPress user, an application password is generally preferable to putting the account’s main password into an automation. WordPress describes application passwords as separate credentials that can be revoked without changing the user’s normal login password.
Create one from the user’s profile under the application-passwords section, then store it in n8n’s credential manager rather than in a Set node, URL, or plain-text field. The exact menu can vary with the WordPress version, host, and plugins.
Read the official WordPress application passwords documentation for the authentication requirements and troubleshooting guidance. If your site uses a different authentication method, confirm that it is supported by both WordPress and your n8n deployment.
Choose a trigger and define a content schema
A reliable n8n WordPress integration starts with consistent input. Do not make the workflow depend on an editor typing a paragraph that n8n must interpret. Use named fields such as title, body, excerpt, slug, status, category, tags, featured_image_url, author_id, and publish_at.
Common triggers include:
- Webhook: useful for a custom editorial form or another application that can send JSON.
- Schedule: useful when n8n should check a queue at regular intervals.
- Spreadsheet or database trigger: useful when an editorial team manages a structured backlog.
- Form submission: useful for collecting briefs, announcements, or internal updates.
Give each item a stable identifier, such as a brief ID or source record ID. That identifier is the foundation for deduplication and makes it possible to find the existing WordPress post during a later update.
Build the n8n WordPress workflow
This section describes a practical way to publish WordPress posts with n8n. Node names and available fields can change between n8n versions, so use the current n8n WordPress node documentation as the final reference for your installation.
1. Add the trigger
Start with the trigger that matches your source. For a queue, a scheduled workflow can retrieve records whose status is “ready for WordPress.” For an external system, a Webhook node can accept a POST request containing the content fields.
Keep the trigger payload small and explicit. If the source only sends a record ID, add a database or spreadsheet lookup immediately afterward so the rest of the workflow receives the same predictable structure on every run.
2. Validate required fields
Use an If node or another validation step before calling WordPress. At minimum, check that the title and body exist, the source identifier is present, and the requested status is one of the values your process allows.
Useful validation rules include:
- Reject an empty title or body.
- Reject titles that exceed your editorial limit.
- Allow only approved status values such as draft, pending, future, or publish.
- Require an approval flag before allowing a publish status.
- Check that a supplied URL uses HTTPS and points to an allowed domain when media is downloaded automatically.
- Normalize tags and category names before attempting a WordPress request.
Send invalid items to a separate review path with the reason for rejection. A workflow that silently drops records is difficult to trust.
3. Normalize the content
Use Edit Fields, Code, or equivalent transformation nodes to map source fields to WordPress fields. Keep presentation logic separate from source data so you can change the site template without rebuilding the trigger.
For a standard post, the mapped data commonly includes:
- Title: the post title shown in WordPress.
- Content: the article body as HTML or the format expected by your site.
- Excerpt: a manually written or validated summary.
- Slug: an optional URL slug that has been normalized and checked for conflicts.
- Status: draft, pending, future, publish, or another supported state.
- Author: a WordPress user ID, if your account is allowed to assign it.
- Categories and tags: taxonomy IDs rather than arbitrary labels when the endpoint requires IDs.
- Date: a valid future date when scheduling is part of the workflow.
Do not assume that text containing Markdown will automatically render correctly in every WordPress setup. Convert it to the format your site expects, or use a controlled HTML template. Sanitize generated HTML and avoid accepting arbitrary scripts, event handlers, or unsafe embeds.
4. Check for an existing post
Duplicate prevention is one of the most valuable parts of an n8n content approval workflow. Before creating a post, search your source system for a stored WordPress post ID. If no ID exists, you can also search WordPress by a carefully chosen slug or another unique value, although title matching alone is not reliable.
Use an If node to split the workflow:
- Existing post found: update that post, subject to the record’s current approval state.
- No post found: create a new draft or pending post.
- Ambiguous match: stop and send the item for human review rather than guessing.
After a successful create operation, save the returned WordPress post ID back to the source record. That turns later edits into updates and gives the team a direct way to trace a content item across systems.
5. Create the WordPress post
Add the WordPress node and select the post resource and create operation. Select the credential you created earlier, map the normalized fields, and start with a draft status.
Run the workflow with a test record that contains harmless text. Confirm all of the following in the WordPress dashboard:
- The title and body appear in the intended editor.
- Paragraphs, links, headings, lists, and quotations render correctly.
- The author, category, tags, slug, and excerpt are correct.
- The returned post ID is recorded in the source system.
- The workflow does not create a second post when you rerun the same input.
If the built-in node does not expose a field required by your site, use an HTTP Request node against the appropriate REST endpoint. The WordPress REST API documentation is the source of truth for the request method, endpoint, body fields, and response format.
6. Add approval before publication
A basic approval path can set the new post to pending and send an editor a link to review it. The editor can approve the item by changing a field in the source queue, submitting a form, or using a separate webhook.
When approval arrives, the second workflow should:
- Retrieve the source record and its stored WordPress post ID.
- Confirm that the approval belongs to the expected content item.
- Check that the post is still in the expected state.
- Apply final edits or media updates if needed.
- Change the status to publish or future.
- Write the publication result and timestamp back to the source system.
Do not treat an email reply or a simple “yes” value as sufficient identity verification for high-risk publishing. Use an authenticated editorial system or a controlled approval form when the workflow can publish externally visible content.
Handle images, taxonomy, and scheduling
Upload a featured image through the media endpoint
Creating a post and uploading media are separate operations. If you have an image URL, n8n typically needs to download the file as binary data, send it to the WordPress media endpoint, capture the returned attachment ID, and then pass that ID into the post creation or update request.
The WordPress media REST API reference documents the fields and responses for media uploads. In practice, confirm that the file has an allowed MIME type, a sensible size, an appropriate filename, and permission for your site to use it.
A media branch commonly works as follows:
- Check whether the source record already contains a media ID.
- Download the image with an HTTP Request node configured to return a file.
- Upload the binary file to WordPress.
- Set the media title and alternative text where your process supplies them.
- Capture the attachment ID from the response.
- Use that ID as the post’s featured-media value.
Do not copy an image from the internet merely because it is accessible. The workflow should use media supplied by your team or from a source with documented rights. Alternative text should describe the image’s purpose, not repeat a keyword or say “image of” unnecessarily.
Map categories and tags safely
WordPress usually identifies categories and tags by numeric IDs. A source system may store human-readable names, so add a lookup step before post creation. If a category is missing, decide whether n8n may create it or whether the item should stop for review.
Automatic taxonomy creation can produce near-duplicates such as “AI,” “A.I.,” and “artificial intelligence.” A controlled vocabulary is easier to maintain. Keep a mapping table for approved labels and reject values that do not appear in it.
Schedule posts with explicit time zones
Scheduling is a common source of errors because the source application, n8n server, database, and WordPress site may use different time zones. Store a full date and time with its time-zone context, then test a future post in a non-production environment or at a low-risk time.
Use a future status only after confirming how your WordPress site handles the supplied date. Record the intended publication time and the actual result so an editor can distinguish a workflow failure from a WordPress scheduling issue.

Add approval and error handling
Design an approval state machine
A single boolean called “approved” is easy to misuse. A clearer content state might be brief, ready for draft, draft created, needs changes, approved, scheduled, published, or failed.
Store the following values alongside the source record:
- Source record ID.
- WordPress post ID and post URL.
- Current workflow state.
- Last attempt time.
- Approval user and approval time, where applicable.
- Last error message, excluding secrets.
- Content or revision version.
These fields make retries safer. They also help an editor determine whether a change should update an existing draft or create a new revision.
Handle API failures and retries
WordPress may reject a request because of authentication, permissions, validation, rate limits, a malformed field, a missing taxonomy ID, or a server problem. Configure a failure path that records the response and alerts the right person instead of repeatedly sending the same request without context.
Retries are useful for temporary network or server failures, but they can create duplicate posts if the first request succeeded and the response was lost. Check for an existing post ID or unique source ID before retrying a create operation.
Separate transient failures from permanent errors:
- Transient: timeout, temporary server error, or unavailable network connection. A limited retry may help.
- Permanent: invalid credentials, missing permission, invalid taxonomy, malformed HTML, or a rejected file. Fix the input or configuration first.
- Ambiguous: the request may have succeeded but n8n did not receive the response. Search for the expected post before retrying.
Log without exposing sensitive data
Keep enough execution information to diagnose a failed workflow, but do not log application passwords, authorization headers, private customer data, or complete confidential briefs. Limit who can view n8n executions and decide how long execution history should be retained.
Send operational alerts to a team channel or email address that is monitored. An alert should identify the source record, workflow name, failure stage, and safe error summary. “WordPress failed” is less useful than “Media upload rejected: unsupported MIME type for source item 1842.”
Security and maintenance
Use the least powerful WordPress account
The n8n credential should belong to a dedicated account rather than a personal administrator account. If the workflow only creates drafts, it should not use credentials capable of changing site settings or managing users.
Review the account and application password periodically. Revoke credentials that are no longer used, and rotate them when a team member leaves or a system may have exposed them.
Protect the n8n endpoint
If you use a Webhook node, treat its URL as an entry point to your automation. Use authentication or a signed request where supported, validate incoming fields, and avoid allowing arbitrary callers to select a publish status.
For higher-risk workflows, put approval and publication in separate workflows with separate credentials. The intake workflow can create drafts, while the publication workflow requires a stronger approval signal and a credential with only the necessary WordPress capability.
Review generated and imported content
WordPress content automation can preserve a template, but it cannot guarantee that an imported article is accurate, original, accessible, or appropriate for your audience. Add checks for unsupported claims, missing sources, broken links, duplicate titles, excessive headings, and missing alternative text.
For AI-assisted content, treat the model output as an input to editorial review rather than as proof of publication readiness. Use a human reviewer for facts, attribution, quotations, regulated topics, and claims that could affect a person or organization.
Test changes in a safe environment
Keep a test site or a restricted draft workflow for changes to templates, credentials, plugins, custom fields, and taxonomy mappings. Test one complete record and at least one failure case after every material change.
A useful test matrix includes:
- A normal article with no image.
- An article with a featured image and several tags.
- A missing title or body.
- An invalid category.
- A duplicate source record.
- A rejected media file.
- An approval arriving after the post has already been changed manually.
- A temporary WordPress or network failure.
Key Takeaways
- Start with draft or pending posts instead of direct publishing.
- Use a stable source ID and store the WordPress post ID to prevent duplicates.
- Keep content fields structured so validation and updates are predictable.
- Upload featured media separately, then assign its attachment ID to the post.
- Use WordPress application passwords or another supported authentication method, and store credentials securely in n8n.
- Make approval, retries, and failure notifications explicit parts of the workflow.
- Test time zones, taxonomy IDs, HTML formatting, and duplicate handling before enabling production publishing.
Frequently Asked Questions
Can I automate WordPress publishing with n8n without coding?
Yes. The built-in WordPress node, trigger nodes, conditional nodes, and field-mapping nodes can handle many workflows without custom programming. You may still need an HTTP Request node for an unsupported endpoint, a custom post type, or a plugin-specific field. You also need to understand WordPress permissions, REST API fields, authentication, and the structure of the data entering the workflow.
Is n8n WordPress automation safe for automatic publishing?
It can be safe for narrowly defined, low-risk content when the input is trusted and the workflow validates every field. For most editorial sites, creating a draft or pending post is safer than publishing immediately. Add deduplication, approval checks, restricted credentials, logging, and an error path before allowing an automated workflow to set a post to publish.
How do I connect n8n to WordPress?
Create a dedicated WordPress user, generate an application password, and add the credential in n8n. Then select the WordPress node and map the site URL and credential to a post operation. Test with a draft. If the connection fails, check HTTPS, REST API availability, the username and application password, firewall rules, and whether the user has permission for the requested operation.
Can n8n upload a featured image to WordPress?
Yes. Download the image as binary data, send it to WordPress through the media endpoint, capture the returned attachment ID, and use that ID when creating or updating the post. Validate the file type and size, supply appropriate alternative text, and confirm that your team has permission to use the image. A post request that contains only an image URL may not automatically create a WordPress media attachment.
How can I stop n8n from creating duplicate WordPress posts?
Give every source item a stable unique ID and store the WordPress post ID after the first successful creation. At the start of each run, look up that ID and update the existing post instead of creating another one. If no ID exists, use a carefully controlled secondary check such as an exact slug or source marker. Do not rely only on a similar title, because legitimate posts can share related titles.
Can n8n schedule WordPress posts?
Usually, a workflow can send a future status and publication date through the WordPress REST API or the WordPress node. The exact fields depend on the endpoint and your installation. Test the date format and time zone with a draft or low-risk post before using it for a campaign. Record the intended time and result so your team can investigate missed schedules.
Should I use the WordPress node or the HTTP Request node?
Use the WordPress node when it exposes the operation and fields your workflow needs; it is easier to configure and read. Use HTTP Request when you need direct control over an endpoint, a custom post type, a media operation, or a plugin-specific REST route. In both cases, follow the permissions and request structure documented by your WordPress site and the relevant API reference.
Conclusion
n8n WordPress automation works best as a controlled publishing pipeline rather than a one-click replacement for editorial judgment. Use structured inputs, validate them before the API request, create drafts first, store post IDs, handle media as a separate step, and require approval before public release.
Start with one content type and a draft-only workflow. Test a normal item, a duplicate, a missing field, a failed media upload, and an approval update. Once those cases behave predictably, add scheduling or selective automatic publishing with the smallest WordPress permissions your process requires.